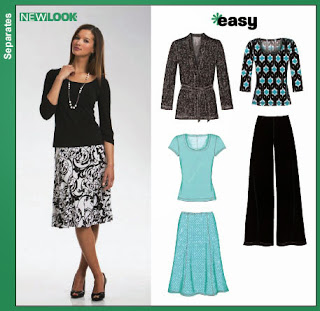
Butterick 5215
I don't have much experience sewing with knits. Actually I don't have a lot of experience with any sewing lately. I often end up with work related shirts that are men's shirts, and as much as I often want the logo on the shirt, I don't like the cut. I have had some success adding vertical darts to some men's button down shirts, so a few years ago I bought a basic tee pattern, Butterick 5215, with the goal of re-making some of the t-shirts. Well truth be told I haven't had much luck with that. So I decided to smarten up and learn to make a tee that I am happy with.
When I had cut out B5215 I was using view B, the semi-fitted version. I think I shied away from version A, the fitted version, because it has negative ease and I wasn't sure that would work out with the existing tees. So this time around I decided to make a wearable muslin with view A.
First I traced a copy of the pattern onto pattern tracing paper I ordered online from Nancy's Notions. I chose a 95% polyester 5% spandex that I got on sale for $5 a meter (regularly $15).I don't like necklines right up at my neck so I added a scoop to the neckline. I also added 1" to the length at the waist. I followed the sizing based on my actual measurements so I cut the L version tapering out to XL for the waist and back to the L for the hips(d@mn menopausal midriff!). There was definitely a learning curve putting this baby together because the instructions are MIA. Also, even though I bought a serger many years ago, I've barely used it and don't know much about it. I first used a long stitch on the standard sewing machine to sew the sides and shoulder seams. Then I serged those seams to finish them with a narrow three thread overlock seam. I attached the neck band as per the "Threads" video , and then did the sleeves pretty much the same way. I did sew the hems of the sleeves before attaching them. For all hems I first pressed a 1" hem and then tucked the raw edge under to create a 1/2" double-fold hem. I topstiched these with a medium straight stitch.
So what worked well; I really like the cap sleeves and the fact that they fit my arm snugly. I don't like it when cap sleeves show off my armpits (especially on those occasions when I haven't been all that diligent with the razor). I decided to make the fit as the pattern was designed for my measurements and it fits much snugger than the picture shown. Having said that, I'm ok with that. I like my t-shirts on the snugger side. I also like the fact that it is not "skin tight" across the middle, which I was concerned about with the negative ease built into the pattern. Must be some magic going on there. Or my math is off. Let's go with the magic. I think the overall length is good so I'm glad that I lengthened the pattern (I am 5'7" and long-waisted if that helps). I am happy with how the scooped neckline turned out. I used a RTW shirt as a guide but still I was concerned that it would be easy to go overboard. I would be comfortable wearing this neckline to work. I am also happy that I used an old pattern (therefore free) and got the fabric on sale for $5 a meter. A $5 wearable top makes the cheap b@stard in me very happy!
What didn't work well; the shoulder seams need to be wider. Although based on the measurements from the pattern pieces I knew this going in, I thought that perhaps this was to accommodate the stretch of the fabric. Especially since the rest had negative ease based on the body measurements used in the sizing charts. For this reason I did not use any type of binding or stabilizing in the shoulder seems to prevent stretch, but I will still need to make an adjustment there for the next time. And yes, there will be a next time. I would like to try a version with 3/4 sleeves that I think I can frankenstitch from another pattern. Other than that I will have my sewing/fitting expert (my mom) help me critique it for any further fine tuning, but all in all I think this pattern can be a winner.


Comments