 |
| Before and After - Simplicity 1696 |
I first
made and blogged about this pattern five months ago. I was happy enough with them although they didn't look like the
pattern pic. I wanted a more fitted pant, closer to a jean, which is what I thought I would get with this pattern. See the extra folds of fabric under the butt in the left view above? I wasn't thrilled with that. I've only worn them once, and since every time I've put them on I felt they looked worse. I had taken apart the side seams a month or so ago to remove the piping and try taking them in but because of the front pockets I wouldn't be able to do this. So I sewed them back up and left them to languish in my closet.
I modeled them for my mom the other day and she commented on how there was way too much fabric in the back. So I decided to remake them from scratch to see if they could be something I would wear. One of the first things I discovered when revisiting the pattern was that I had lost 1 1/2" in my hips in the five months since making these! No wonder they were too baggy! The second thing I noticed is that there is a whole section on fitting the pants in the instructions that didn't seem familiar to me at all, so I am assuming I bypassed them the first time around. Did I even read the instructions?
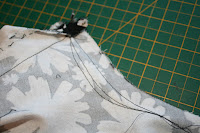
I traced out the pattern going down one size and changed from the regular fit to the slim fit, seeing as I have a flat butt and not a lot of difference between my waist and my hips. I sewed them up and took the pics shown below and at the bottom of the page. I decided I needed to get rid of the wrinkles under my butt, so I took a scoop out of the bottom of the seat seam as recommended in the pattern. I did this twice, but it is hard to determine how much of an impact alterations are having when your fabric has as much stretch as this fabric does.


Comments