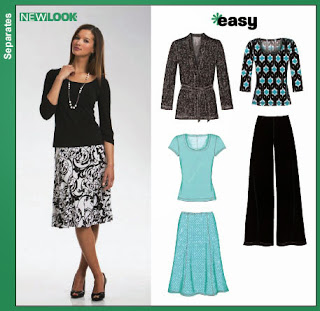
Butterick 5493
For today's project I am revisiting Butterick 5493 which I first blogged about here. If you scroll down on that post to the solid green version you will read about how I messed up the pattern and how I'm not happy with the shoulders that stand up away from my body. I have enough of this green crepe left over that I can use it to make another one. This will be a good comparision as I will cut this one on the grain as the pattern calls for and then I can compare the difference in drape. I spend hours yesterday re-drafting the pattern. First I traced out a fresh version. This involved grading down because the pattern set starts one size above my size. I must have bought this pattern in the very early days of sewing when I still believed that the body measurements listed on the pattern were what you go by.
Once I had the fresh pattern drawn out in my size I made my bust adjustments; I lowered the bust point 1 1/2" and did a 1/2" full bust allowance. I then added 1" in length at the "lengthen" line to accommodate my back waist measurement and another 1" at the hem as a fashion choice. I want to wear it as a tunic over my green cammo leggings.
I basted it for fitting and the bust was too low - by an inch! So back to the drawing board, I again altered the pattern by raising the bust dart 1". I made that change on the garment and took it in at the sides from below the bust dart tapering in 3/4" at the waist and back out to the hips. That was enough for one day.
_________
Back at it today, I was test driving some new feet and decided to try sewing a narrow hem with the sewing machine on this top as opposed to the rolled hem I did with the serger on the first version. It turned out beautiful! Now I have to think about how I want to do the neck and armholes. I'm not sure I want to use the store bought bias binding as that didn't work out so well last time. I wonder if a facing would look better. Hmmm...
_________
Today I am questioning my decision to change the straight sides to more fitted sides. Yes I know I like a more fitted garment but this changes the whole look/style of the top. It doesn't hang as well and feels uncomfortable, like it is pulling.It would have been better shaped with darts, but again that changes the whole look. I think I will remove that alteration.
_________
I removed the alteration taking in the sides. This gives me a looser, flowy top. I only hope that the washable marker I used to mark my alterations truly is washable.
I ended up making my own bias binding using these directions from Craftsy. For the record a 20" square gives me approximately 15 feet of 2" bias strips. I then used this method to attach the binding, using two rows of stitching. I pressed it well after both the first stitching and the second.
The shoulder seam lays much flatter on this version.
After this was all said and done I have a much better shell than the first version. I tried to adjust the gaping shoulders on the first one and saw that the bust darts are much too high, and it pulled and twisted. I think the bias cut wasn't working as well as I would like. Version 1.0 is definitely a wadder, but 2.0 is a keeper, and I have an adjusted pattern I can use again.
_________
 |
| V1 on the left, V2 on the right |
To finalize this never-ending post, I thought I would post a comparison pic of the two tops; V1 and V2. To be honest I think at first glance V1 looks more flattering on Gertrude here. But a closer look shows that the shoulders are off. Also the bust darts look correct on V1 but that's because Gertrude has a higher bust than I do. V2 fits me properly. V1 was tapered in at the waist. I may still play with that on V2, because I do think it is more flattering. And I think I prefer the curved hem shape on V1 as well as the serged rolled hem. I love how my narrow hem turned out on V2 but I just think that V1 looks better as a tunic over leggings with that lettuce hem. The necklines are different because I used the vee neck version and cut my own scoop on V1 and used the scoop neck version out of the pattern for V2. The neck and armholes were bound on both versions, but V1 used commercial tape and V2 used self tape. V1 was cut on the bias and V2 was cut on the straight grain. I'm not noticing a big difference with how it drapes, but V2 is definitely more comfortable to wear.


Comments